Honey-Fermented Garlic Mead: A Rich Mead for Cooking or Drinking
Originally Posted: 3/25/2021

Table of Contents
Quick Specs
- OG = 1.105
- ABV: 13.8%
- Taste Profile: Garlicky and rich
- Time: A few weeks as Honey-Fermented Garlic, plus a few weeks after adding water and yeast, plus a few weeks for clarification
- Yield: 1-gallon test batch
Intro
I first became interested in making a garlicky mead after reading Jereme Zimmerman’s Make Mead Like a Viking and seeing his recipe for a “Mushroom and Garlic Mead Madness”. A few years later, I had become a fan of Brad Leone’s YouTube videos about fermentation. One of the recipes that interested me was Honey-Fermented Garlic, which has been exploding on the internet for the past few years.

When I got around to try making Honey-Fermented Garlic myself, I decided to do a little experiment. I bought twice the ingredients I would need and set up two 1-gallon fermenters full of the stuff. One fermenter would just be Honey-Fermented Garlic, and the other would be a test mead (just to see if it would work).
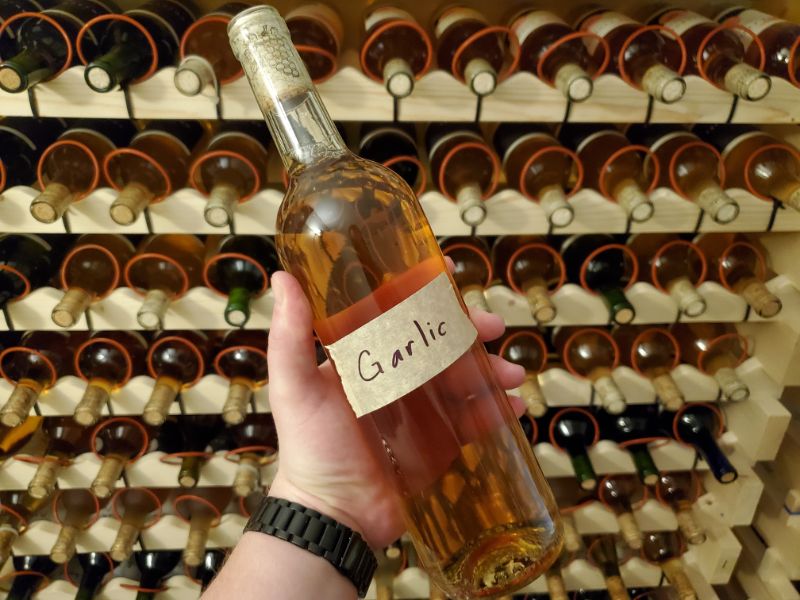
I’m very happy to say that it worked, and I was quite pleased with the results.
Ingredients
For the Honey-Fermented Garlic
- 3 lbs. (1.36 kg) raw wildflower honey. Note: you must use RAW honey for this recipe, because you need the wild microbes in the honey in addition to those on the garlic.
- Garlic cloves: a roughly equal volume of peeled garlic cloves. I think this came to between 2 and 3 cups of garlic for me (and let’s say a 500mL to 750mL measurement of garlic cloves in metric). Not gonna lie, I just eyeballed it for both the test batch and the second batch
- An acid, like lemon juice or apple cider vinegar. If using apple cider vinegar, I would use a pasteurized one because acetobacter could potentially turn your mead into more vinegar.


For Turning it Into Mead:
- Water (non-chlorinated) to fill to 1-gallon (or about to 4L)
- Your choice of champagne yeast. I like to use Lalvin EC-1118 for non-fruity meads like this

Equipment
- Sanitizer such as Star-San
- Fermenter
- Airlock and stopper. For this project, I used a 1-gallon mason jar with a lid and airlock because wide-mouth fermenters are easier to deal with when using fruits or vegetables
- pH test strips or an electronic pH meter, to help you keep the pH below 4.6
Instructions
Note: Steps 1-5 are for the Honey-Fermented Garlic alone, and steps 6-9 are for turning it into Mead. I’ve also included safety notes regarding the (relatively low) possibility of botulism from ground-based vegetables like garlic, and how to prevent it.
- Optional: Warm honey to make it easier to pour. As I often recommend, set the honey jar in water, and use a sous vide circulator (if you own one). Usually, I set the temp to 94°F (34°C), but since we want to make sure we keep the wild microbes from the raw honey intact, I either lower this temperature or even skip this step altogether.
- Sanitize your fermenter and any other equipment that will touch the mixture with Star-san or a similar sanitizer.
- Add honey and garlic cloves to your fermenter and stir to coat. The garlic will mostly stay floating at the top of the honey throughout the fermentation process.
- Add lid and airlock, fill airlock with sanitizer solution or cheap vodka.
- Check pH periodically with pH test strips or pH meter. If you’re cautious like I am about the possibility of botulism coming from garlic cloves (since they come from the ground), you want the pH to stay lower than 4.6.
- Clostridium botulinum, the microbe that causes botulism, can’t survive in acidic (4.6 or lower) or alcoholic (higher than 6% I think) environments. As fermentation progresses, pH should eventually stabilize below 4.6 and you won’t have to add acid as often.
- That being said, when I did my initial research into making Honey-Fermented Garlic, I didn’t find a single case online of someone catching botulism from it. Still, better safe than sorry!
- For more information about fermentation and the (relatively low) possibility of botulism, I’ve found this article.
- Once fermentation slows, add water to fill up to 1-gallon (~4L), then add champagne yeast.
- Wait for primary mead fermentation to stop, then rack your mead off the garlic cloves and into a new sanitized fermenter.
- Wait for mead to clarify, at least a week or two, then bottle.
- Drink plain (it’s surprisingly good on its own), or use it in cooking to enrich recipes that call for wine.


Variations
I would eventually like to make a 5-gallon batch, closer to Jereme Zimmerman’s “Mushroom and Garlic Mead Madness” from Make Mead Like a Viking. Whereas he uses shiitake mushrooms, I’m thinking of also adding chanterelle to the recipe, especially if I can get some locally grown ones in the fall.

Culinary Uses
I’ve used this mead to enrich soups that called for cooking wine. One soup I’m looking forward to doing is Lobster Bisque with garlic mead replacing the more traditional sherry.
I’ve also given a few bottles to my mom, and she’s used it in recipes such as Chicken Marbella and her Bolognese sauce.


