A guide to making healthy and probiotic Lacto-Fermented Garlic, and to preserving raw garlic for longer periods of time.
Originally Posted: 3/29/2021

Table of Contents
Intro
Garlic is one of my favorite ingredients to put into savory dishes. It’s used in both raw and cooked forms in many cuisines around the world. It can be eaten raw, sautéed, roasted, or turned into sauces and spreads. I’ve even managed to make a surprisingly drinkable mead out of it (though I mainly plan on using that for cooking.
And of course, garlic can be pickled.
Garlic is often touted for its health benefits, with some claiming that it can lower blood pressure and cholesterol. With this Lacto-Fermented Garlic pickling recipe, we’ll be adding an additional health benefit: probiotic, gut-healthy lactobacillus.
Note: The brine for this recipe comes from “Fermented Vegetables” by Kirsten K. Shockey and Christopher Shockey, which is a great book for beginner fermentationists.

Equipment
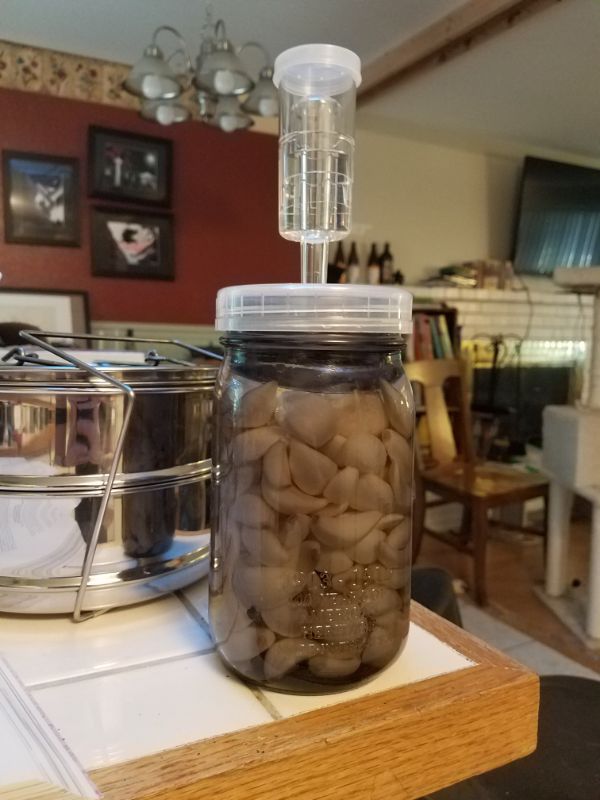
- Wide Mouth Mason Jar
- Pickling lid and airlock. I prefer these over silicone “Pickling Pipes” because I’ve gotten much more consistent results. Also, the 3-piece airlocks themselves are the same ones used in homebrew.
- A canning funnel is useful to prevent spilling.
- Large measuring pitcher (optional, but it makes mixing large amounts of brine quicker). I also use mine a lot in brewing.
- Pickling weights. Alternatively, I’ve heard of people using plastic bags of brine or marbles as weights.

Ingredients
- Garlic cloves. I like to use those 3lb. bags of peeled garlic cloves from Christopher Ranch that you can pick up from Costco. However, I saw someone buying a bag at least twice that size (and probably for a lot cheaper) at a restaurant supply store yesterday, so you might find better deals elsewhere.
- 3.5 – 4% Brine. Use sea salt or Kosher salt (never use iodized salt, as this will kill the good bacteria).
- Optional: your choice of herbs or spices for flavoring. Personally I don’t think garlic needs anything extra, but I’ve put a few dried peppers in there in the past.

Instructions
- Mix your brine. I like to use the “Basic Brine” ratio from page 78 of Fermented Vegetables by Kirsten K. Shockey and Christopher Shockey, which calls for ½ cup of salt to 1 gallon of water. A ½ cup of salt should come to about 144 grams, which comes to about 3.8% brine based on this chart I found on fermentationpodcast.com and some quick math (144g/3776g). I usually only make ½ gallon of brine at a time, but a 1-gallon measuring pitcher is still helpful here.
- Add garlic to mason jars. I’ve found that I get a little more than 3 jars worth of garlic from one 3-lb. bag of peeled garlic. To speed things up, I place a canning funnel in the mason jar’s opening and add garlic a handful at a time (this makes it easier to do without accidentally dropping garlic cloves on the floor).
- Add pickling weight to jar, but make sure that it will still sit under the lid (headspace).
- Add pickling lid with airlock, then stick the jars somewhere dark and at room temperature. Your house will smell like an Italian restaurant during fermentation, which is awesome.
- Allow garlic to ferment for about 2 weeks, then replace pickling lids with regular ones and store in your fridge. Pickled and stored garlic seems to last forever in the fridge; it’s been almost two years since I made a batch. Use your own judgment though.
- Enjoy your probiotic garlic on its own, or as an ingredient in your favorite dishes.

Tips & Tricks
Lacto-fermented garlic can be used in pretty much any recipe that you would use raw garlic in. It can be crushed, roasted, or used to make aioli or toum.

